Learn Legionella Ready
A whole school put into Legionella Ready, film by film.
Eleven short films, 46 minutes in all, show Oakfield School being set up in the app: its floors and rooms, its plant, and every outlet connected. By the end you can do the same for your own building.
Oakfield School is invented. We made it up so that nothing in the films would have to be blurred or left out. Every room, pipe and tap is there to be seen.
11 films · 46 minutes · Captions and a written transcript on every film · Free to watch
Film 2 of 11 · Plant and the water system
Build the plant schematic
Return to the lower-ground plant rooms, open a saved equipment record and build its schematic.

In this film
Choose a chapter to watch from that point.
- Build the plant schematic
- Start on the lower ground floor
- Open Tank room B01
- Open Boiler room B02
- Follow Show water supply
- Start with an empty drawing
- Add the incoming supply record
- Watch the first symbol appear
- Add the cold-water plant
- Add the calorifier
- Identify the hot-water return point
- Add the missing circulation pump
- Record the three cold-water connections
- Record the return through the pump
- Keep evidence and assumptions distinct
- Save and reload the schematic
- Check the pump in B02
- Review the saved plant schematic
Where this film is on the plan
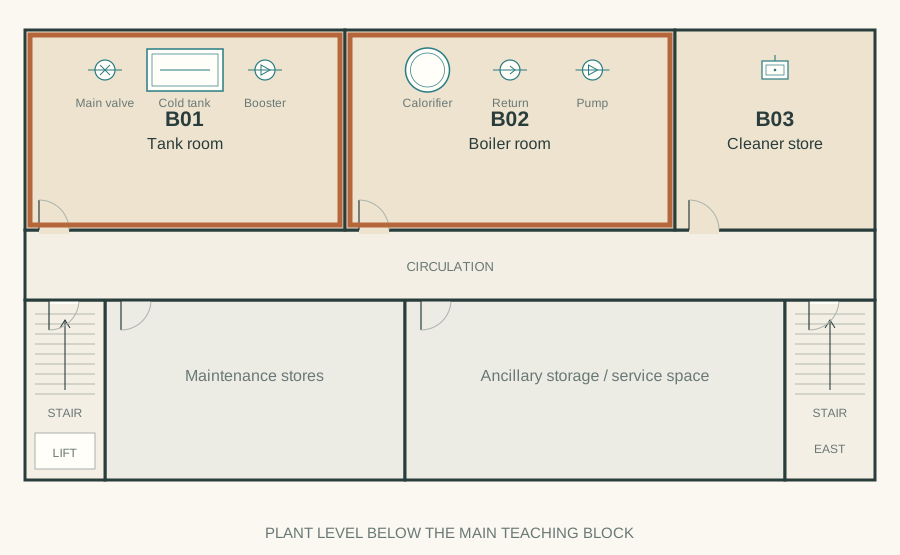
Rooms in this film: B01, B02.
Before you begin and what you’ll learn
The first film has created the rooms, outlets and initial plant records. Now we record how the main equipment connects.
- Find the plant in the saved building map and follow Show water supply.
- Create the schematic from the existing equipment records and add the circulation pump.
- Record the plant connections, then save and reload the drawing.
Read the commentary Timed transcript +
We’re back on Oakfield School’s lower ground floor. This is where we recorded the main water equipment in the first film. We’ll open those rooms first, then follow an equipment record into the schematic and build the drawing there. I’ll explain the choices, with quiet stretches while you follow the steps.
Here is Tank room B zero one. These three boxes are the items we already entered: the incoming supply and main stop valve, the cold-water tank, and the booster set. Clicking each box shows its name. At this stage, we’ve recorded what is here, but not how the items connect.
Next door, Boiler room B zero two contains the hot-water cylinder, or calorifier, and the hot-water return. Those records are already in our building map as well. The circulation pump is still missing; we’ll add that later. First, let’s return to the incoming supply in B zero one.
With the incoming supply selected, I click Show water supply, directly below its name. This opens the schematic for that particular item. The message tells us it hasn’t been added to the schematic yet. The app has selected its existing record, ready for us to use.
Before adding it, let’s look below the form. No connections are drawn yet. The room records have not created a diagram by themselves. We build it by adding equipment and then recording what supplies what. The app arranges the symbols and draws the connecting lines from those entries.
I return to the form and check that the incoming supply is selected, with the Mains inlet symbol. Now I click Use this equipment. That adds this existing record to the schematic.
There it is: our first symbol, labelled with the incoming supply. There are no connecting lines because we haven’t entered any connections yet. I switch to Plant and distribution zones so we can work across both plant rooms. Now we can add the tank and booster.
The tank and booster set are already recorded in B zero one as well. I’m adding each to the schematic and checking its symbol. In this example, the tank stores cold water, and the booster supplies it under pressure. We’ll record their connections after placing the equipment.
Next is the hot-water cylinder, or calorifier, in B zero two. We use the existing record and the Hot-water cylinder symbol. This is the vessel for the hot-water supply. Its presence in the boiler room doesn’t make it a boiler.
We also recorded a Hot-water return in B zero two. Here it represents a point on the return pipe, so I change its symbol to Junction. That gives the returning water a named connection point on this schematic. It is not another tap.
The circulation pump is the item we haven’t recorded yet. I choose Add missing plant, select Pump or booster, and give it a specific name. Then I place it in Boiler room B zero two. When we save, this new equipment will also join that room’s inventory.
Now the equipment has names and locations, we can record the route between it. For each connection, I choose what the selected item supplies, the water circuit and the destination. Here the incoming supply feeds the tank, the tank feeds the booster, and the booster feeds the calorifier. All three connections carry cold water. I also record that these are assumptions for our fictional example.
For these next two connections, the circuit changes to Hot-water return. Our named return point supplies the circulation pump, and the pump returns that water to the calorifier. Follow the source and destination names as I enter them. We are recording the plant end of the return; the distribution loop through the school is still to be added.
A drawn connection and a confirmed connection are different things. These entries remain Unconfirmed because Oakfield is a teaching example. The notes explain the basis of the entries. On a real building, confirmation needs evidence of the route, with an explanation of how it was established. The app provides a place to record that distinction.
I’m saving the schematic, then reloading it. This checks that the equipment and connections are in the saved building record. Reloading is also a useful moment to review the result without the editing forms in the way.
Now we can check the new pump from the building map. B zero two contains the original cylinder and return point, plus the circulation pump. The map and the schematic refer to the same pump. We haven’t made two separate copies of it.
We now have six plant records on the schematic and five saved connections. The diagram describes the main supply and the plant end of the hot-water return. Our connections remain unconfirmed, and the routes through the school’s rooms are not yet drawn. That is the next lesson: connecting the room records to these supplies, so we can follow the water system from the plant to the outlets.
The school
We drew the school so the films can be followed.
Oakfield has a front, five floors and a code on every room. Each room in the films is on a plan, so you can see where you are before you press play.
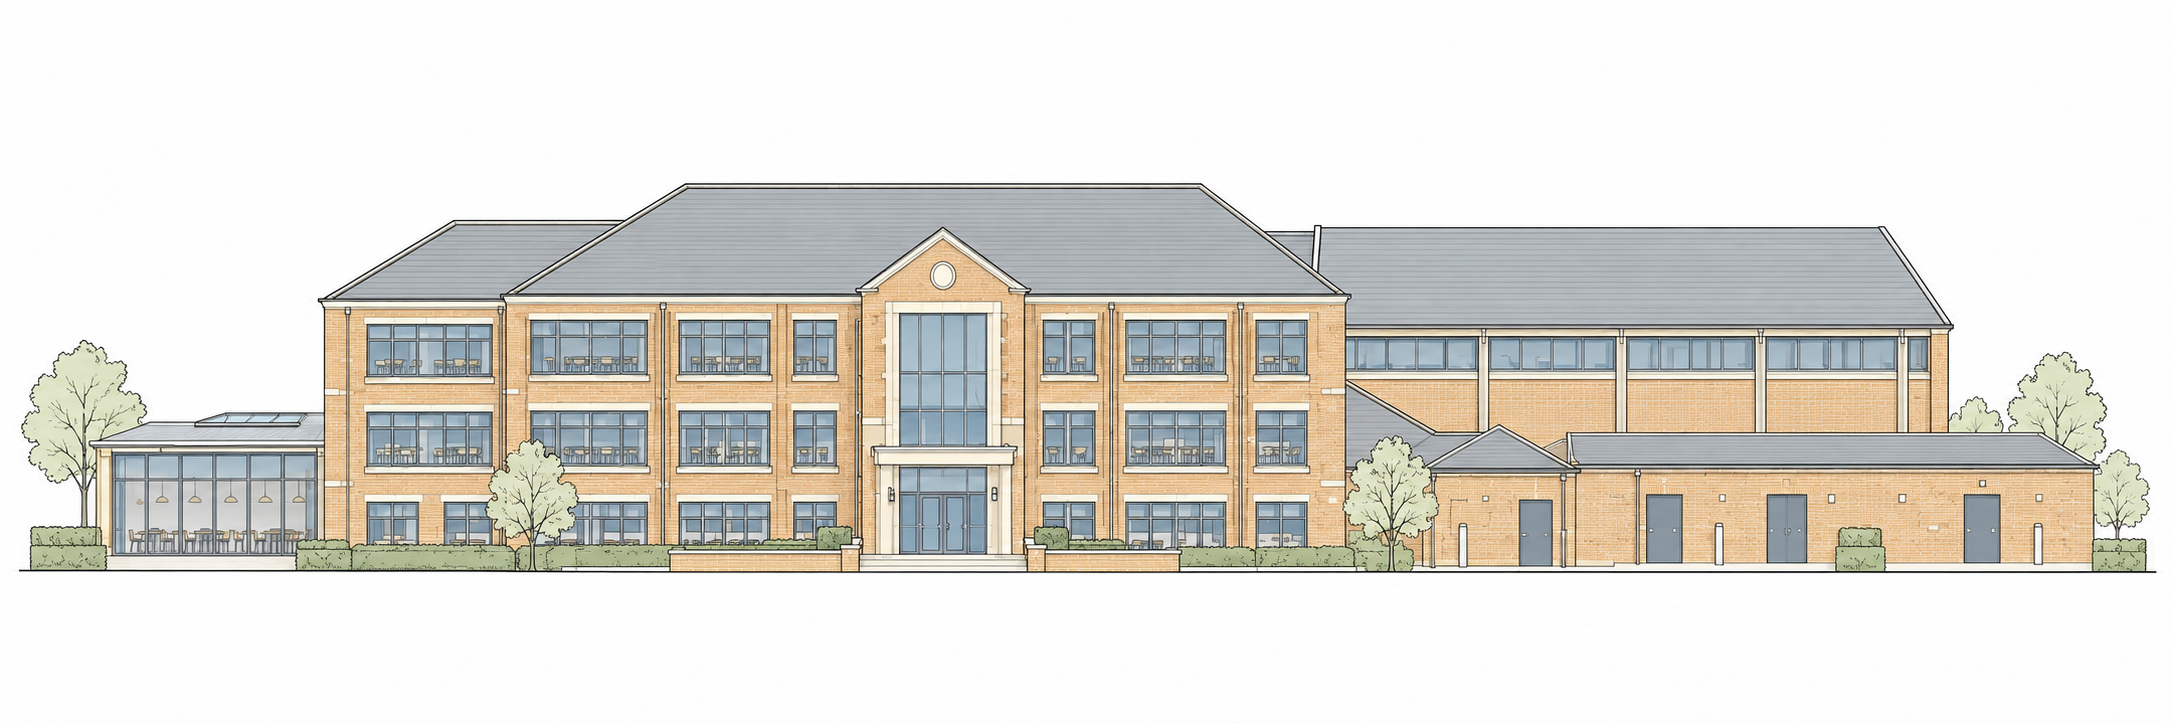
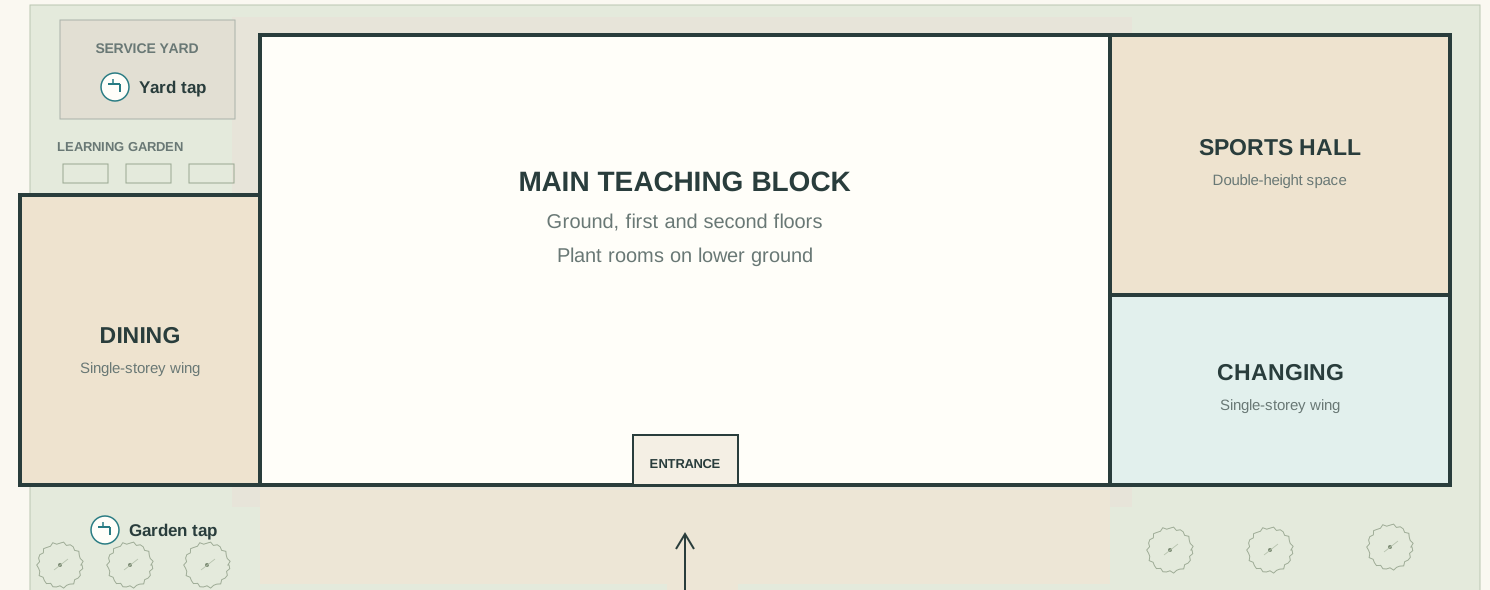
Main entrance, teaching block, dining wing, sports hall and outside taps.
The same for your building
Your rooms, your equipment, your procedures, on film.
The Oakfield films were made by recording the app as the school was built. The same can be done for a real building once it is in Legionella Ready, so your staff learn on the rooms they actually walk through.
What you give us
- Your floor plans, or a walk round the building
- The name of every room with water in it
- The procedures your staff are expected to follow
What you get
- Your building set up in Legionella Ready, floor by floor
- Films of it being built, chapter by chapter, that your staff can return to
- A building record that already exists on the day you start